Search Pineapple & Pork

Sunday, July 4, 2010

It's BEAN a great holiday! HAR HAR HAR

Oh lowly, baked bean. You are a poor, underappreciated side dish. But how I love thee.  When made properly, you can be the star of the show, at least for a vegetarian!  Who wants a dry, chewy veggie burger, when you can have sweet, spicy, smoky, savory baked beans with cornbread?  And how could anyone, carnivore or herbivore, possibly have a 4th of July cookout without baked beans filling one of the divisions of your paper plate?  They're great on hot dogs and they give you something which to dip that dried out bbq chicken...
 Seriously, beans and coleslaw on a hot dog is my summer equivalent of the Thanksgiving sandwich.  Every great flavor of a summer bbq packed into one = SummerBun.  Look at that glorious mess!

Just leave that can on the store shelf. Beans beans, good for your heart!  Leave the cans out of your cart! 

What? I want you to cook your own beans?? You'll have to start them, like, a week ago.  You have to soak them OVERNIGHT!  You have to cook the beans for FOR-EV-ER!  Then you have to BAKE them AGAIN?

No. You don't.  I didn't.

There are myths about cooking beans that have been passed down by the unscientific.  "Never salt your beans until they are done cooking" and "You have to soak the beans overnight prior to cooking".  The former has been busted by my food scientist crush, Kenji Alt-Lopez, formerly of Cooks Illustrated, currently of Serious Eats and Food Lab. Check out the results here.  He says you need salt in your soaking/cooking water to maintain the structural integrity of the bean while still achieving fully done, creamy beans.  You don't want "bean blow-out"and you don't want hard beans.  You will get neither. You will get beans that won't humiliate you in front of your Puerto Rican friend ;).

 I have also heard that you do not actually have to soak your beans overnight.  I don't want beans tomorrow.  I want beans today.  For today's bbq, apparently three people said they were bringing beans, but in the end, only mine were on the table.  I BET you it's because nobody wanted to start beans yesterday.  I know you don't do actual work for over 12 hours for beans, but it's on your mind and on a hot July three-day weekend, that really is too much to ask.

Please don't interrupt my nap on the couch. 

I did a search for no-soak beans and I found a post by the Paupered Chef.  You can skip the soak by covering the beans in and inch and a half of salted water and bringing it to a boil.   For all you folk who don't measure, it's the same as rice cooking: enough so that the water level above the beans comes to the middle of your middle finger. Then put the tightly lidded pot (a Le Creuset if you've won one, ha!)  into a 250degF oven for about 75 mins (my larger-than-pinto cranberry beans needed about 90-100 minutes) and your beans should have no bones, a.k.a they're done.

Since I saved so much time with my first successful attempt at from-scratch bean cooking, I decided to make my own BBQ sauce for the very first time!  I had hopes that this would be simple enough to use as a go-to BBQ sauce instead of the cloyingly sweet supermarket stuff that have HFCS as the first ingredient. 

Oh, Cooks Illustrated, how could I live without you?  I followed the recipe for their Simple Sweet and Tangy BBQ sauce.  Well, I did make a couple substitutions (Chris Kimball, don't hurt me!).  HOWEVER, it was still fantastic and lots of people liked it enough to ask for the recipe.  I will include the recipe at the end, unadulterated.  You can adulterate it all you want.  Have fun.  Just be aware that Chris Kimball might be shaking his head in disapproval whilst looking quite smug.

The beans and bbq sauce come together in this post from Serious Eats. Just mix two cans worth of beans with a cup of sauce, a little water, a little brown sugar, a little Worcestershire sauce and stick it in the oven until the beans have soaked up all that sweet, smokey goodness.  It couldn't be simpler, and if you don't want to make your own sauce, use your favorite from a bottle.  Fast(er) baked beans.  What a concept!

Simple Sweet and Tangy BBQ Sauce

Makes about 1 1/2 cups.   Published July 1, 2000.  

Ingredients

1 medium onion , peeled and quartered
1 cup ketchup
2 tablespoons cider vinegar
2 tablespoons Worcestershire sauce
2 tablespoons Dijon mustard
5 tablespoons molasses
1 teaspoon hot pepper sauce , such as Tabasco
1/4 teaspoon ground black pepper
1 1/2 teaspoons liquid smoke (optional)
2 tablespoons vegetable oil
1 medium clove garlic , minced (about 1 teaspoon)
1 teaspoon chili powder
1/4 teaspoon cayenne pepper

Instructions

1. Process onion and 1/4 cup water in workbowl of food processor fitted with steel blade until pureed and mixture resembles slush, about 30 seconds. Strain mixture through fine-mesh strainer into liquid measuring cup, pressing on solids with rubber spatula to obtain 1/2 cup juice. Discard solids in strainer.

2. Whisk onion juice, ketchup, vinegar, Worcestershire, mustard, molasses, hot pepper sauce, black pepper, and liquid smoke (if using) in medium bowl.

3. Heat oil in large nonreactive saucepan over medium heat until shimmering but not smoking. Add garlic, chili powder, and cayenne pepper; cook until fragrant, about 30 seconds. Whisk in ketchup mixture and bring to boil; reduce heat to medium-low and simmer gently, uncovered, until flavors meld and sauce is thickened, about 25 minutes. Cool sauce to room temperature before using. (Can be covered and refrigerated for up to 7 days.)

Wednesday, June 30, 2010

It's practically health food!

We've secretly replaced their usual pork sausage with veggie 'sausage'.  Let's see if they notice!

I have a great workplace.  Every Friday at 9:30AM we have a potluck breakfast.  There are four teams and we rotate.  This week is my first time participating and I volunteered to bring biscuits and gravy.  I already have a few people who are very excited about this.  I don't know if anyone's ever brought biscuits and gravy.   I LOOOVE biscuits and sausage gravy.  It's probably my most favorite southern dish.


Problem is, I can't leave well enough alone.  I have no idea if there are any vegetarians or religious abstainers of pork at work.  Some weeks there aren't any meats served at all and we just have a plethora of bread and sweets.  So when there is protein, it's usually not vegetarian, to my knowledge anyway.

Biscuits and gravy is an innately fattening and artery clogging manna from heaven, so why not lighten it up a bit? It's GRAVY ON BUTTERY BREAD.  Come on!  We have a few calories to spare here. I'm not lightening the biscuits, just so you know.  I don't want them to be hockey pucks.  Though, I will be using Spectrum non-hydrogenated shortening, so, yay! no trans fats.

I will not be responsible for killing my coworkers. 

So, tonight, I tested out Gimme Lean sausage (available near the tofu at your local grocer's) in sawmill gravy. I've never had this brand before.  I very much enjoy Morningstar Farms breakfast sausage patties, but using that would be rather expensive and tedious since they're already little patties.  Did I mention that about 150 people work at my company?  I have no idea how many people come to breakfast, but it's a lot.  Luckily, each breakfast team has about 15 people so each serving can be very small.  Anyways, the verdict?  Very yummy!  I followed Alton Brown's recipe for regular sawmill gravy where you brown your sausage, dump it out of the pan and then make a milk gravy from the fat and fond.  In this case, I browned the 'sausage' in olive oil and then added more olive oil when I made the roux for the gravy.   I did end up browning the 'sausage' some more in a non-stick pan (to keep the fond on the meat and not on the pan).  During this browning, I adding a pinch of sage and crushed fennel seed along with salt and pepper to give the fake meat a stronger, more breakfast sausage-like flavor.

Nobody knows my plan to bring a vegetarian dish and frankly, I'm a little nervous.  While I don't really care what people think about my cooking, I really hope people like it.  I hope they don't get all disappointed when they find out there is no pork in this crockpot.

Luckily, nobody at work knows whether or not I can cook at all...

Sunday, June 27, 2010

Food Festival in Richmond

Ages ago, on June 6th, I went to Richmond, Va to visit my bestest friend in the whole wide world because I love her and she's my favorite and she's beautiful and smart... and Oh yeah, there was a food festival that weekend!


 Grace!  Ain't she a doll?
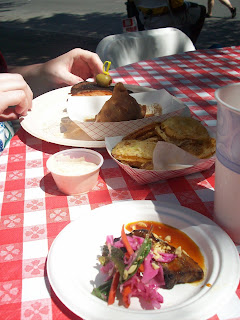
The event was called Broad Appetit.  Over 50 Richmond restaurants participated.  There were booths for blocks and each generous plate or portion was only $3.  Here are my favorites:

First up was dessert!  These were the first great macarons I've ever had.  These are soft, tender cookies with a crisp outershell sandwiching a creamy middle.  Typically the cookies are made of ground almonds, but these particular ones also contained hazelnut and pistachio meal. 

On the left was the Passionfruit with Milk Chocolate and on the right was Pistachio and Bittersweet Chocolate.  Both were to perfectly structured (crisp shell, good feet, tender middles) and utterly delightful.   I wouldn't expect anything less from someone trained by Pierre Herme himself.  However, I preferred the Passionfruit for its intensity.  It was tart! and I wasn't expecting that from a cookie. 
 
They come from Petites Bouchees.  The owner, Veronica also has a blog where I learned that she is also Filipino!  Very inspiring :)  


We had so much fantastic food!  There was a salmon reuben, samosa, fried green tomatoes, Thai flavored pork belly, soft shell crab sandwich, goat cheese filled fried squash blossoms, grapefruit tartlet, and grilled lamb.  
 
 
Mmmmm...food memories.  Unfortunately, I'm a terrible Richmonder (mostly because I live 2 hours away), and I really didn't pay attention to where all this food came from. I guess I'll just have to go back again and again and again.  Pity. Ha!

Speaking of where food comes from my favorite vendor at the festival (other than Petite Bouchee) didn't even cook anything at all.  This school bus is a farmers market on wheels called Farm to Family. The bus makes trips all over town and stop mostly at school parking lots.  And they just recently opened up a real store.  I'm friends with them on Facebook and all of their updates make me wish I lived in Richmond just so that I could shop there.  The concept is just so fantastic - everybody, regardless of what part of town you live in, should have access to good, fresh, local food. 
I bought a box of strawberries from farmer/ bus driver, Mark.  The day was hot, so the fragrance of these sweet gems were just too overpowering and I succumbed.  They were a perfect ending to a delicious day.


Wednesday, May 19, 2010

I know you're checking...

Stop pressuring meeeeee!!!!!

Monday, March 29, 2010

I'm no professional. I'm just wingin' it.

How do the food bloggers do it?  You know, post regularly.  With gorgeous daylight pictures.  I'm convinced all the good bloggers don't have day jobs outside of the home.  I unfortunately have a regular ol' outside-of-the- home job and a long commute to boot.  I don't keep the camera around my neck every time I enter the kitchen.

Most cooking I do is just something thrown together to feed my hungry belly.  And that's ok!  In fact, it's great.  The ability to make something satisfying from seemingly unrelated items in your fridge, freezer, and pantry is a valuable skill. It keeps you from hitting the fast food joints.  It makes you more creative in the kitchen.  Waste not, want not, too!

Julia Child insisted that you shouldn't have to use a recipe every time you cooked.  If you had to follow a recipe every time and you never learn the basics, you'd never be able to cook.  I gave that theory a test yesterday morning.  I've made macaroni and cheese a dozen times following the America's Test Kitchen recipe.  It is luscious and decadent and a heart attack on a plate.  And all it is is a properly made mornay sauce with pre-cooked noodles. Now here are some basic definitions that sadly, a lot of people aren't familiar with anymore.   A mornay sauce is a bechamel sauce with cheese.  A bechamel sauce is milk thickened by a roux.  A roux is flour and fat mixed together into what I heard Alton Brown call "Southern Napalm".  Sauces aren't hard, right?  Um, yeah...

Here is what happened: First I boiled noodles in salted water.  When they were tender, I dumped them into a collander and melted butter in the same pot.  I hate dishes.  Then I whisked in about the same amount of flour.  Maybe too much.  Maybe I should have used a measuring spoon instead of a regular spoon.  Maybe I should have tried to add the same amount of flour each time.  It's actually supposed to be the same amount by weight, not volume.  Hm.  Oh well, let's keep going.  I added the milk off heat then brought it back to a boil to thicken.  If it was too thick, I could add more liquid.  But then I'd have too much sauce.  Too much cheese sauce?  Bah, no such thing.  Oh good, it looked right.  I added the cheese and mustard powder and salt and pepper.  Oh dear, the cheese made it thick.  Very thick.  Help, more milk!  Um...okay...this is okay.  I added the noodles.  Yeah, this is gonna be rich. 

So, in the end I had really rich and thick mac and cheese that I made all by myself.  The world didn't end,  I didn't have to crack open a blue box, my mouth was happy, and my belly was full of cheesy noodles.  Success!

Thursday, March 18, 2010

An Irrational Amount of Pi(e) (part 2) a.k.a. it's all about crust

When we last saw Aileen, she was in a food coma.

"Doctor, do you think she'll ever wake up?"

"I'm not sure.  I'm not a doctor, I only play one on T.V."

Soap operas are weird.  Anyway, I'm finally not full! So, I'll tell you about the savory portion of my birthday celebration.

To really celebrate Pi Day, you have to have savory as well as sweet pies.  Immediately pizza pies were the obvious and most popular choice.  But you could also have empanadas, shepherd's pies, tamale pies, some people even make paella.

But who are you kidding?  Pizza is the best.

My stand-by recipe is based on America's Test Kitchen's pissaladiere.  I love this crust because it is not too thick or thin and also nice and chewy.  I've done it so many times I know it only takes about 2 hrs from food processor to table.  I've baked it in the oven on a stone as well as on the grill.  I prefer the grill because you can get a nice char on it.  Unfortunately, this time there was tooooo much char on the bottom.  Oh well, it's been a whole season since we've grilled. I kinda forgot how, lol.  
Wait, these pie aren't round.  Well, some pie are squared. LOL! NERD!  Ok, these look more like amoebas.  Picky picky.

These are probably my favorite pizza toppings.  The margherita is tomato, fresh mozzarella, and tons of basil.  The other is Italian sausage, sauteed mushrooms, and caramelized onions with tomato and cheese.  I'd also be happy if it were just onions and mushrooms and olives, closer to an actual pissaldiere.
Sauteed cremini mushrooms and caramelized onions...mmmmMake sure you get a nice brown crust on the mushrooms and the onions are really caramelized, not just sauteed.  Don't forget to deglaze the onions with water and the mushrooms with sherry.

I don't make pizza sauce.  I just use tomatoes that taste good on their own.  So, I only use Cento canned tomatoes because other canned tomatoes taste like the can.  You can also probably use any other brand of San Marzano type tomatoes.  Most of the time I just crush the tomatoes and spread them on the dough, but this time I had my brother/sous chef season it up a bit with some Italian seasoning and whatever else he wanted. 

The same and additional toppings were used on a new addition to my recipe box: Chicago style deep dish pizza!  The recipe can be found in the Feb 2010 issue of Cooks Illustrated
Good thing I wasn't making cake.  I wouldn't have had any pans.
These pizzas were decadent.  Making the dough involves lamination which means after letting it rise for an hour, you slather it with softened butter, roll it up and let it rise some more.  You end up with buttery pizza perfection.  However, do not eat this for breakfast.  You will not feel good, trust me. 

My brother artfully topped this one with LOTS of pepperoni.
 I'm touching your food!

Later that night, my brother came across the America's Test Kitchen episode for Chicago deep dish pizza.  What a coincidence!  It wouldn't be so scary if this exact same thing hadn't happen before when I made tomato soup, pizza bianca, and talked about digital scales.  I think Chris Kimball is stalking me. 

Pissaladiere crust from Cooks Illustrated (I hope they don't break my legs for posting this) that I'm writing from memory, I've done this so much.  Did I mention my dad asks me to make pizza every chance he gets?

You will need a big food processor.  Or strong arms and intuition as to when bread has been kneaded enough. Which I don't have, so I have a food processor.  
2  cups of bread flour  (I've also had good results with APF, better if a tbs of vital wheat gluten is added, and is essential if you use white whole wheat.  I've never tried with regular whole wheat.)
1 tsp yeast
1 tsp salt
1 tbs olive oil
1 c water, 110degF (About a minute in the microwave, if you don't have a thermometer.  But if you don't have a thermometer, GO BUY ONE)

Put the dry ingredients in the food processor fitted with the plastic dough blade.  Don't dump the salt on the yeast, lest you make the yeast angry.  You won't want to see them angry.  Pulse to mix.  

With the machine running, slowly add the olive oil.  Then slowly add the water.  Stop adding water when the dough has formed a ball.  Continue running the processor for 15 seconds.  

Flour your work surface and your hands.  Dump your dough onto the counter and knead a few times to make a ball.  Put your dough in an oiled bowl or a big 4cup measuring cup.  Turn the dough over in the oil to coat it.  It will rise better if it doesn't have to break through a dry crust.  Cover the bowl and let it rise for about and hour and a half in a warm spot.  If you don't have a warm spot, set it on a heating pad.  Tell it a bedtime story. 

While it's rising, ready your toppings and heat your oven 500degF with the stone placed on the lowest rack.  Or, heat up your grill. 

When the dough is doubled in size (which is why a measuring cup is nice to use) divide it in half and gently form little balls with all the edges gathered underneath.  Let it rest under a towel or plastic wrap for 10min so the gluten relaxes and you can make a big a pizza pie. 

After the 10 mins, stretch the dough by letting gravity help.  With oil coated hands, hold one end of the dough and let the rest stretch toward the ground until you have something that is about 8 x 14in.  

If you're using your oven, generously coat your pizza peel with cornmeal (cream of wheat works well, too) to use as tiny ball bearings.  (You do have a peel, don't you?  No?  How about the underside of a baking sheet?  You have a stone, right?  If not, use a baking sheet, but it will not be nearly as good.  I haven't tried it, but I've heard pretty good things about an upside down cast iron skillet,but you'll have a small round pizza, and possible too thick of a crust. )  Place your dough on the peel and add your toppings.  Not too much, or it'll be soggy.  Make sure your dough isn't sticking to the peel while you work.  When all the toppings are on, slide the pizza on the stone and bake for 12 minutes or until the cheese is melted and your crust is crusty.  

If you're using your grill, you'll want to use indirect heat, so shove all your coals out of the way.  I'm always afraid the dough will fall through, so I use a large piece of oiled foil.  Place the stretched dough on the foil.  Since the dough still sticks a bit, the pizza never shrinks and you can get it pretty thin.  Bake the crust without toppings for about 5 -10 mins or until the bottom starts to brown and char (depending on how much you like char).  Flip it over and peel off the foil.  Add your toppings (you can add more toppings than on a oven baked pizza since the bread is already cooked and can absorb some juices.  Close the grill and it's done when the cheese is melted (another 5 mins, maybe). Keep an eye on it so you don't make charcoal pizza!

Devour immediately (before someone else does!)

Tuesday, March 16, 2010

An Irrational Amount of Pi(e) (part 1)

Happy 30th birthday to meeee!  How does it feel to be 30? Well, it feels like 29 only with 365 more days.  Honestly, it feels good.  I hated my 20s, lol.  Cuh-razy is all I'll tell you. But let's not dwell on the past, let us celebrate life with pie!  (Hm, reminds me, I still have to read the Life of Pi ).

My birthday happens to fall on Pi Day, or 3.14, March 14th.  Yes, it's a math joke. It's celebrated the world over by nerds.  We also celebrate Einstein's birthday but he would be 131 and I don't even know if he liked pie.  Pi Approximation day is also celebrated on July 22, probably more so in countries that write the date with the day followed by the month. 

Blowing out 30 candles over 4 square feet left me lightheaded.
So to celebrate my big 3-0 I decided to make 30 mini-pies. My good friend, Danyel, graciously also made 3 pies.  We couldn't eat just sweets, so I also made 4 pizza pies.  Two were grilled and two were deep dish. This was my first try at deep dish and let me tell you what - YUM.  Anyway, total pie count = 37.  Did I mention there were only 5 people here for dinner?  Such an irrational thing to do! HA! Nerd...
Pi(e)!
To be extra nerdy, some of the pies had little pi symbols!  I used 5 crusts (3 homemade, 2 store bought) to make the mini pies in muffin tins.  I made the dough three days ahead of time and shaped everything over the next three days before and after work.
I cut out 5 inch rounds using a bowl as a template and cut them in half to fill the tins.  I filled the gaps with extra dough.  The crimps were made with the help of the rounded end of a hand held nut cracker.  Otherwise, my giant fingers would have made HUGE crimps.
The morning of my birthday I made apple, blueberry, cherry, strawberry, and egg custard filling.   That was all done sooner than I thought and cooling the pies didn't take as long, happily, since they are so small!

The recipe for crust is below.  The recipe for the egg custard is just this one here and it was my first try at it.  I won't repost it here, because I didn't LOVE it.  It was damn good though, but I would go back and play with it to make it a little creamier.  The recipe for the fillings is hardly a recipe: fruit (if fresh, like apples, dice and cook until tender) + sugar + about a tablespoon of cornstarch dissolved in about a cup of cold water + heat = pie filling.  If you want, add your vanilla (for apple) or almond (for cherry) extract at the end when the cornstarch is clear.  Add cinnamon and nutmeg, maybe some cardamon to your apple filling.  Lemon juice to your blueberry and strawberry fillings is nice.  Just wing it and play and have fun!  Trust yourself, it will work out deliciously! You can't play around too much when baking, but here you can, so do it!

Danyel made three pies for me!  They were pumpkin, chocolate pudding in a homemade graham cracker crust, and a delightfully, refreshing pink lemonade ice cream pie in a shortbread crust.

Pumpkin had a face that was an accidental cutie pie! Yes, that's a wax droplet on the bottom.  It took awhile to blow all those out :/
They were all delicious and I couldn't have had a better present.  But she also got me a gift card to Williams-Sonoma. Squee!

Up next: Pizza pies!  I'm not going to go into making pizzas right now because making 34 pies pooped me out and it was also Daylight Saving Time which made my birthday the absolute shortest day of the year.  I feel so cheated.  Oh well, I'll just have to celebrate ALL year ;)


Combination butter and shortening pie crust from Simply Recipes (such a great blog!) that really makes pies easy as themselves:

  •  2 1/2 cups all purpose flour
  • 1 teaspoon salt
  • 2 Tablespoons sugar
  • 3/4 cup (a stick and a half) unsalted butter, chilled, cut into 1/4 inch cubes
  • 1/2 cup of all-vegetable shortening (8 Tbsp) (I use Spectrum non-hydrogenated shortening)
  • 6-8 Tablespoons ice water
1 Combine flour, salt, and sugar in a food processor; pulse to mix. Add the butter and pulse 4 times. Add shortening in tablespoon sized chunks, and pulse 4 more times. The mixture should resemble coarse cornmeal, with butter bits no bigger than peas. Sprinkle 6 tablespoons of ice water over flour mixture. Pulse a couple times. If you pinch some of the crumbly dough and it holds together, it's ready. If the dough doesn't hold together, keep adding water, a tablespoon at a time, pulsing once after each addition, until the mixture just begins to clump together.
2 Remove dough from machine and place in a mound on a clean surface. Divide the dough into 2 balls and flatten each into 4 inch wide disks. Do not over-knead the dough! Dust the disks lightly with flour, wrap each in plastic, and refrigerate for at least an hour, or up to 2 days before rolling out.
3 After the dough has chilled in the refrigerator for an hour, you can take it out to roll. If it is too stiff, you may need to let it sit for 5-10 minutes at room temperature before rolling. Sprinkle a little flour on a flat, clean work surface and on top of the disk of dough you intend to roll out. Using a rolling pin, apply light pressure while rolling outwards from the center of the dough. Every once in a while you may need to gently lift under the dough (a pastry scraper works great for this) to make sure it is not sticking. You have a big enough piece of dough when you place the pie tin or pie dish upside down on the dough and the dough extends by at least 2 inches all around.
4 When the dough has reached the right size, gently fold it in half. Lift up the dough and place it so that the folded edge is along the center line of the pie dish. Gently unfold. Do not stretch the dough. 
5a If you are only making a single crust pie, use a pair of kitchen scissors to trim the dough to within 1/2 inch of the lip of the dish. Tuck the overhang underneath itself along the edge of the pie dish. Use your fingers in a pinching motion, or the tines of a fork to crimp the edge of the pie crust (never do this. it looks awful. learn to crimp).
5b If you are making a double crust pie, roll out the second disk of dough. Gently place onto the top of the filling in the pie. Use a kitchen scissors to trim the overhang to an inch over. Fold the edge of the top piece of dough over and under the edge of the bottom piece of dough, pressing together. Finish the double crust by pressing against the edges of the pie with your finger tips or with a fork.
6 Use a sharp knife to cut vents into the top of the pie crust, so the steam has a place to escape while the pie is cooking. Optional Before scoring, you may want to paint the top of your crust with an egg wash (this will make a nice finish). This is not optional in my opinion. Make a pretty golden pie!  Egg wash is just an egg beaten with tablespoon of water or milk. 
I would also freeze your pie or, at least the crusts, before they are filled prior to baking to limit shrinkage.  You don't want to work on all those crimps for them to just fall into the pie filling.